As it’s been few months since the Windows 10 release. Some unexpected errors are showing up quite often and one of these errors is error 0x80070422. But this one is easy to fix just like some other windows 10 errors. To know how easy the solution to this error is, just have a look at these solutions.
Showing up on Windows 10 Update Screen
Method 1: Check whether Windows Update Service is enabled or not.
- Find Administrative Tools in Control Panel.
- Find and run services.
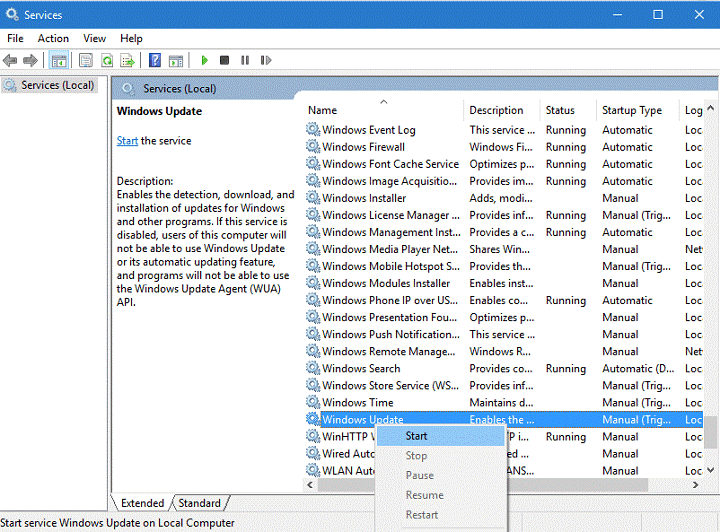
- Look for Windows Update service in the Services Window and open its properties by double clicking.
- Find Startup Type in Windows Update Properties and choose automatic from the dropdown. Check Service status also. If the status isn’t running click start in that section to run it again.
- Click OK and Restart your computer.
Method 2: Disabling IPv6
- Go to Network and Sharing Center in Control Panel.
- Choose properties of your connection by right clicking it.
- Now when the list of items appear, look for Internet Protocol Version 6 (TCP/IPv6) and uncheck it.
- Click OK to save the changes and restart your computer to see if the problem is still there.
Another way of solving this is through Registry Editor
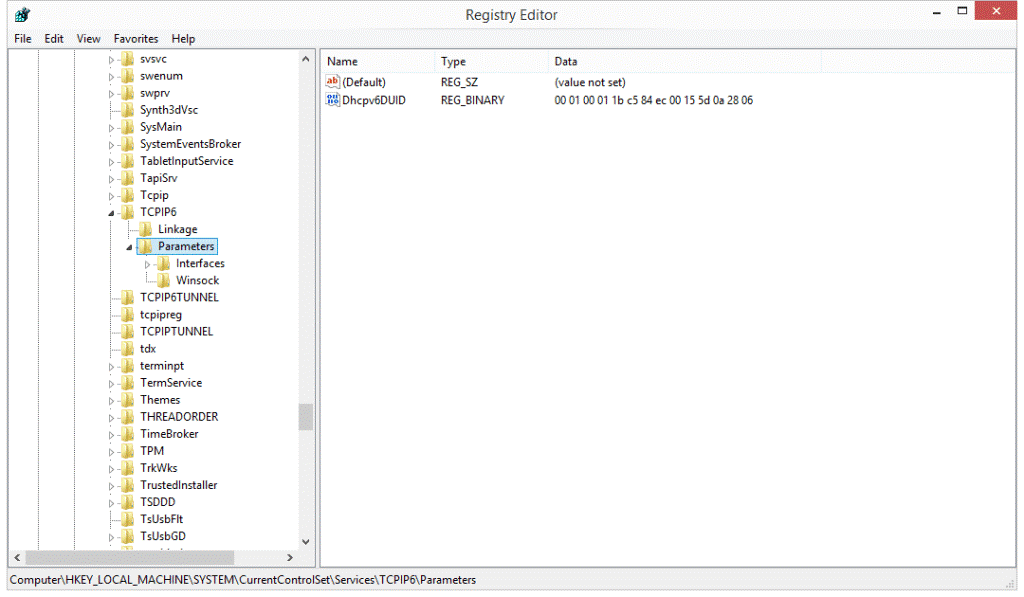
- In the search bar write regedit and from the results list choose Registry Editor.
- Follow: \HKEY_LOCAL_MACHINE>SYSTEM>CurrentControlSet>Services>TCPIP6>Parameters
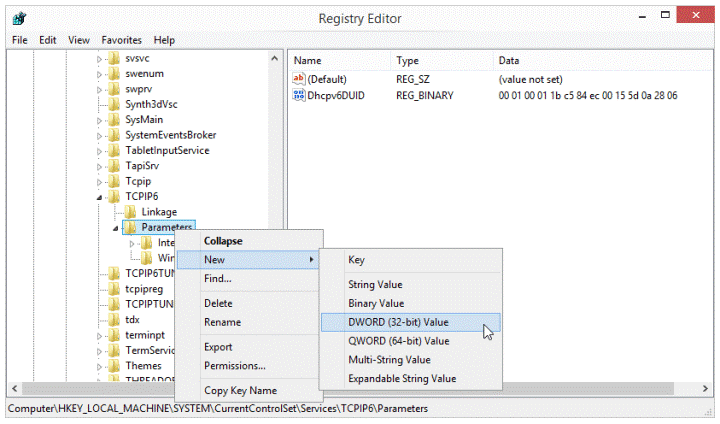
- Right click the Parameters on the left pane and choose New > DWORD (32-bit) Value.
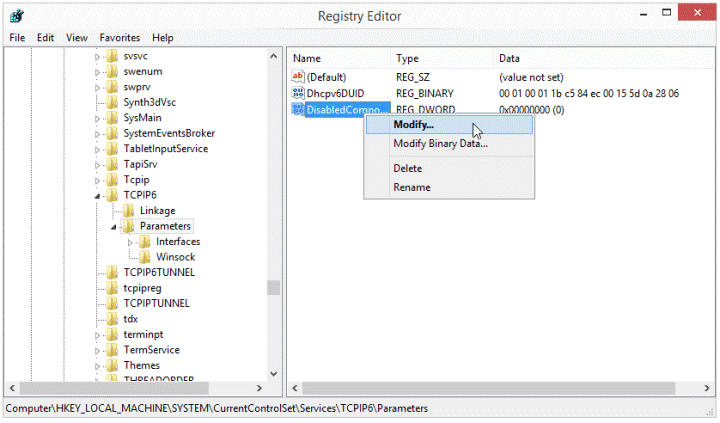
- Enter DisabledComponents in the name field.
- Right click the new DisabledComponents value and choose Modify.
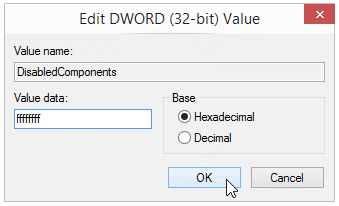
- Enter ffffffff as Value data and press OK to save changes.
- Close Registry Editor and restart your computer.
- Just navigate to the same key like in Step 2 if you want to enable IPv6 and change the value of DisabledComponents to 0 or just delete DisabledComponents key.
Error 0x80070422 Showing up while Enabling Windows Firewall
Method 1: Go for latest Windows Update
- In the Search program and files box (Windows 7) and/or Start search box (Windows Vista) type Windows Update there.
- Click on Windows Update and then click on Check for Updates.
- Click Install Updates.
- In the Search program and files box (Windows 7) and/or Start search box (Windows Vista) type Windows Update there.
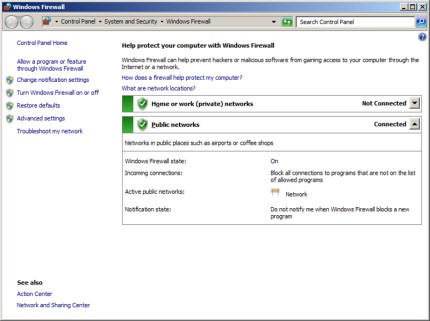
- Select Windows Firewall.
- Click on Turn Windows Firewall on or off in the navigation pane of the control panel.
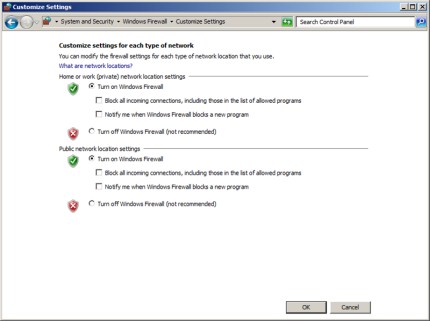
- Click Turn on Windows Firewall for each network location, and then click OK.
Method 2: Enabling Windows Firewall at startup
- Click Start, and then type Servicesin the Search programs and files box (Windows 7) or in the Start search box (Windows Vista).
- Click Services(next to a cogwheel icon), and then click Run as administrator. If you are prompted, enter your administrator user name and password, and then press Enter.
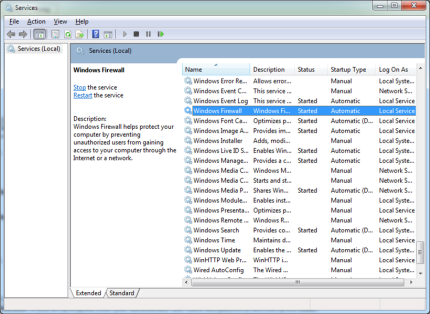
- Scroll until you see Windows Firewall. Double-click Windows Firewall.
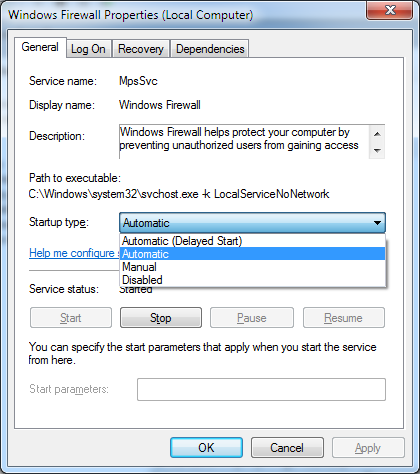
4. Click the drop-down list next to Startup type, and then click Automatic.
5. Restart your computer. Windows Firewallshould be enabled.
Method 3: Malware Scan
- Open the link mentioned below:
http://www.microsoft.com/security/scanner/en-us/default.aspx
- Click Download Now. When you are prompted, save the file to your desktop.
- After installation, move to your desktop and double-click the Microsoft Safety Scanner icon. It may be listed as msert.
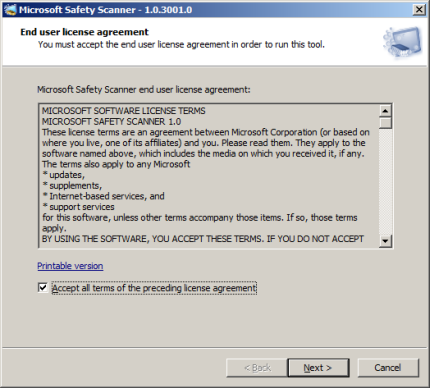
- Check the Accept all terms of the preceding license agreementbox, and then click Next two times.
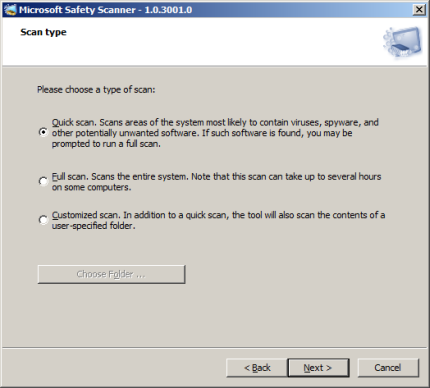
5.Click Quick Scan, and then click Next.
- The Microsoft Safety Scannerwill scan your computer and remove all malware.
- Click Start, and then type Windows Firewallin the Search programs and files box (Windows 7) or in the Start search box (Windows Vista).
- Click Windows Firewall.
- In the navigation pane (left pane) of Control Panel, click Turn Windows Firewall on or off.
- Click Turn on Windows Firewallfor each network location, and then click OK.


 (226 votes, average: 3.55 out of 5)