Your software fails to start. You may see this error message:
The application was unable to start correctly (0xc0000nnn). Click OK to close the application.
Error 0xc0000142 can appear in any of the Windows versions and normally occurs when an application cannot properly boot up. Application Error 0xc0000142 is triggered by a malfunction or a corruption with the program you’re attempting to operate. Lots of people report experiencing this error when trying to run “cmd.exe” which is the DOS emulator program for your computer system. Although this error does not define the actual problem with the system or application in question, you can repair it utilizing a conventional method.
Cause of Error 0xc0000142
- Incorrect registry keys
- Interference from adware or malware
- Interference from security software
- Conflicting programs or processes
Fixing Application Error Code 0xc0000142
Method 1: Clean Boot
The very first method is to perform a clean boot, what it would do is disable non windows programs and start-up programs. You can re-enable them if required.
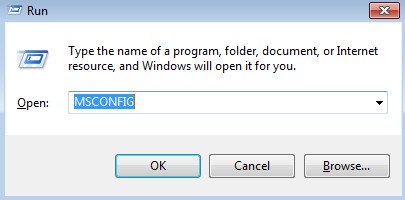
- Hold the Windows Key and Press R on your keyboard to open Run Dialog.
- Type msconfig.
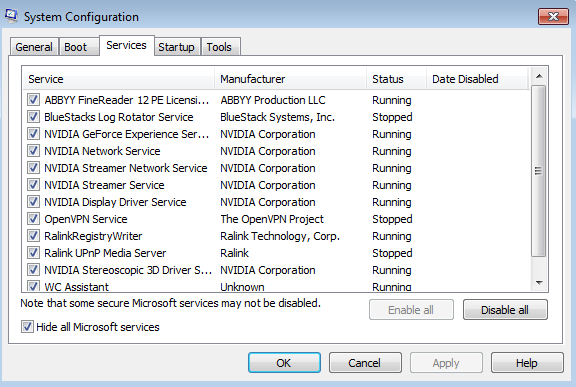
- Click on the Services Tab and place a check on Hide All Microsoft Services then click on Disable All.
- Click Start Up Tab and click Disable All.
- Click Apply and Restart.
Method 2: Update Graphic Card Drivers
Update the drivers for your graphics card from the NVIDIA website (or from your manufacturer’s website).
Often upgrading graphic card driver’s appears to Repair Application Error 0xc0000142 however if it does not then continue to the next step.
Method 3: Review the LoadAppInit_DLLs Registry Key
- Press Windows Key and R on the keyboard to bring up the Run box.
- Enter REGEDIT and click OK.
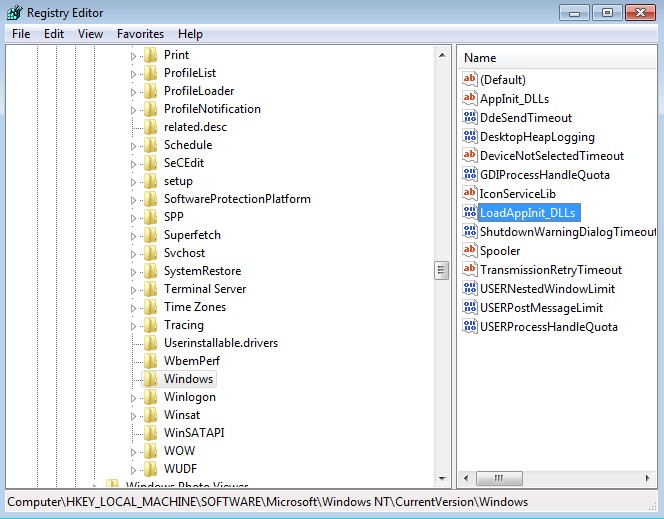
- In the Registry Editor, navigate to:
HKEY_LOCAL_MACHINE\SOFTWARE\Microsoft\WindowsNT\CurrentVersion\Windows\LoadAppInit_DLLs
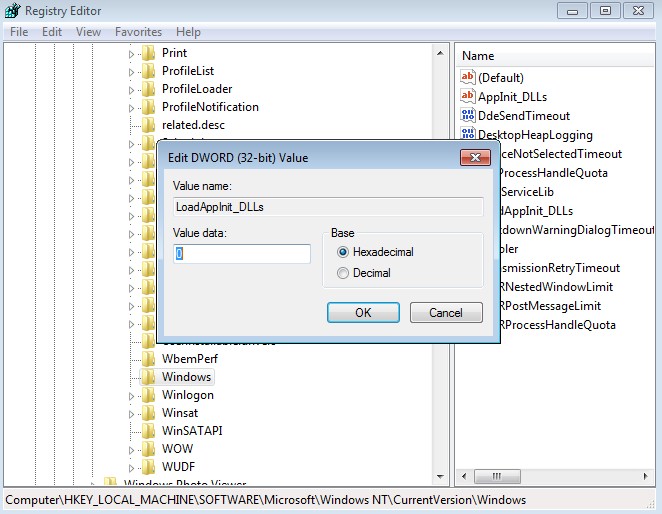
- Double-click the value in the Data column for LoadAppInit_DLLs.
- In the Edit DWORD dialog box, be sure that Value Data is set to 0. If it isn’t, change it to 0.
- Close the Registry Editor.
- Restart your computer and start your Autodesk software again.
Method 4: Running in Compatibility Mode
Running the application in compatibility mode seems to fix this issue for a lot of users.
- Right click on the application icon.
- Select Properties.
- Click Compatibility tab.
- Click Run compatibility troubleshooter.
- When asked, select the Try recommended settings
- Click Test program. Now Windows will try to run your program with the recommended settings.
- If the program run successfully then close the program. If the program didn’t run then you won’t have to do anything
- Once the application is closed, click Next
- Now click Yes, save these settings for this program if the program ran successfully. Click Cancel if the program didn’t run.
- Check the option Run this program in compatibility mode for:
- Select Windows 7 from the drop down list under Run this program in compatibility mode for:. You can try other operating systems as well if the Window 7 doesn’t work.
- Check the option Run this program as an administrator
- Click Apply then Ok
- Now try to run the application and check if it works or not.


 (61 votes, average: 4.62 out of 5)