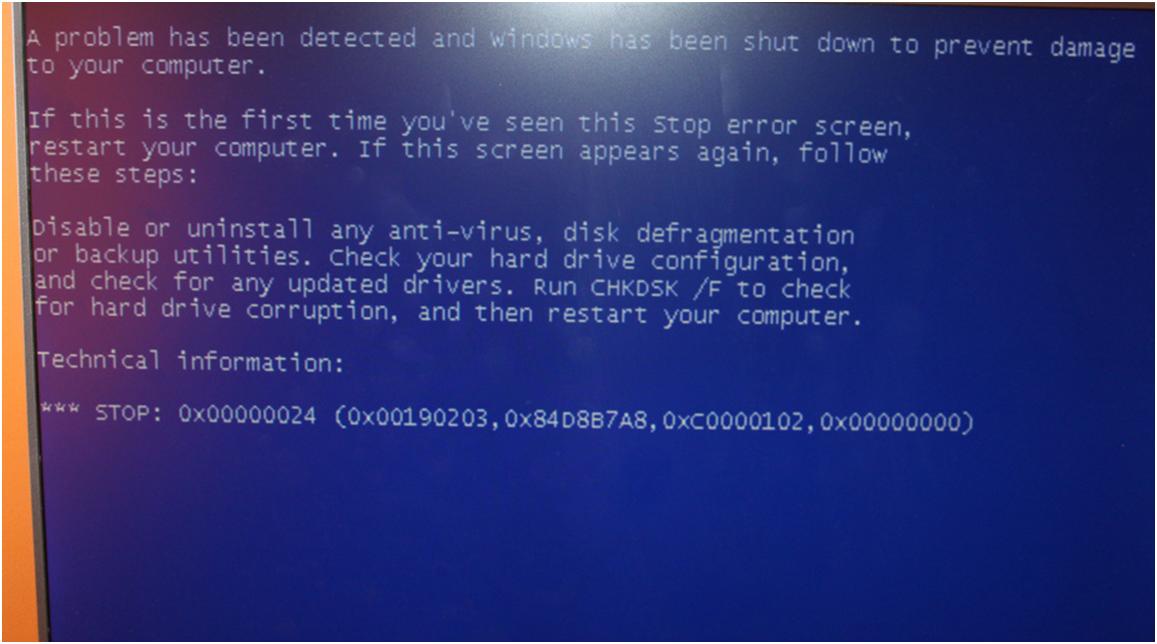
The Error 0x00000024 is a Stop error or Blue Screen Of Death (BSOD) error which indicates an issue with your NTFS file system. The NTFS File System mentioned in the blue screen error is used to read and write to NTFS partitions.
Here is how the error appears:
A problem has been detected and Windows has been shut down to prevent damage to your computer.
NTFS_FILE_SYSTEM
If this is the first time you’ve seen this error screen, restart your computer. If this screen appears again, follow these steps:
Check to make sure any new hardware or software is properly installed. If this is a new installation, ask your hardware or software manufacturer for any Windows updates you might need.If problems continue, disable or remove any newly installed hardware or software. Disable BIOS memory options such as caching or shadowing. If you need to use Safe Mode to remove or disable components, restart your computer, press F8 to select Advanced Startup Options, and then select Safe Mode.
Technical information:
*** STOP: 0x00000024 (0x001902F8, 0xF1534434, 0xF153414, 0xF8408BAB)
*** Ntfs.sys – Address F7B50024 base at F7B4A000, DateStamp 45d6a04b
Methods to Fix Error 0x00000024
There are various methods to fix the Stop error 0X00000024 in Windows XP.
Boot in Last Known Good Configuration
This should be the first thing that you should try, as it is the easiest and most effective solution to fix the Stop error 0X00000024. Follow the steps below:
- Restart the computer.
- Wait for the computer to complete the POST process (system information appearing on your screen).
- Quickly press the F8 key repeatedly until you see a list of boot options available.
- Choose Last Known Good Configuration (your most recent settings that worked).
- Press Enter
- Wait for your computer boot into this mode.
See if the error still exists or not. If you still face the error try the next method.
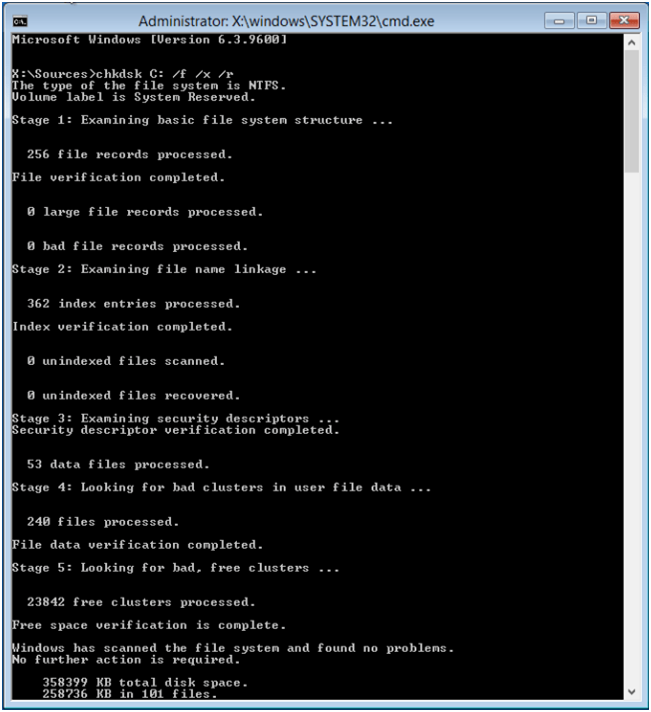
Check Your Disk with Chkdsk Utility
If the hard drive has its file integrity compromised, it is possible to use built-in Windows CHKDSK utility to scan the disk and fix the file system errors.
Here are the steps to run CHKDSK:
- Boot from your Windows install disc.
- Click on Repair your computer after selecting proper language, time and keyboard input.
- Select the Windows installation drive, which is usually C:\ , and click Next.
- Choose Command Prompt when the System Recovery Options box appears.
- Write “chkdsk: /f /x /r” and press Enter.
Replace C: with the letter of the driver where Windows is installed.
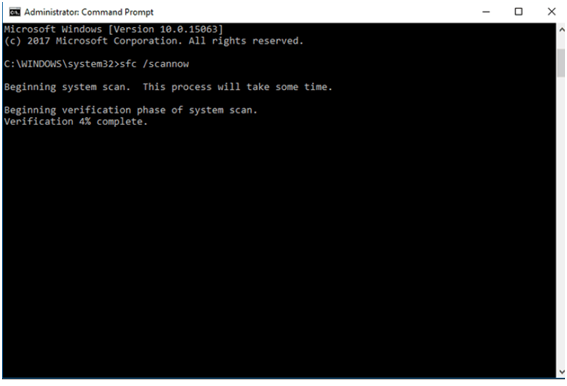
Rrun sfc /scannow
This handy tool ensures scanning and restoration of corrupt Windows system files including NTFS_FILE_SYSTEM. This process can easily run on Windows 10, 8, 7, XP.
- Open the command prompt with administrator privilege.
- Open Start Menu and right click on Command Prompt -> Select Run as administrator.
- After opening the command line, type sfc/scannow
- This command will take few minutes to scan your PC.
- Once the execution gets completed, close the command prompt.
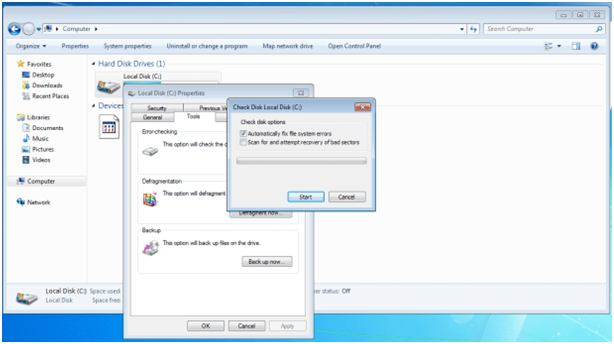
Automatically fix file system errors
Try checking the volume for error in the file system. Here are the steps to access Error-checking panel in Windows:
- Open My Computer
- Right click on C:\, where your Windows version is installed, and select Properties
- Select the Tools tabs from the window
- The first item is “Error-checking” where you need to click on “Check Now..”
- Make sure to have the Automatically fix file system errors option is checked
- Click Start


 (57 votes, average: 4.63 out of 5)