Some Windows users reported that they are experiencing mouse stuttering after they upgraded to Windows 10 from Windows Vista/8/8.1. Mouse stuttering could be the result of some problems appeared in Windows 10. Many Windows users have experienced mouse stuttering problem and if you are one of them try the methods given below to overcome mouse stuttering issue.
Method 1: Enable/Disable Scroll Inactive Windows
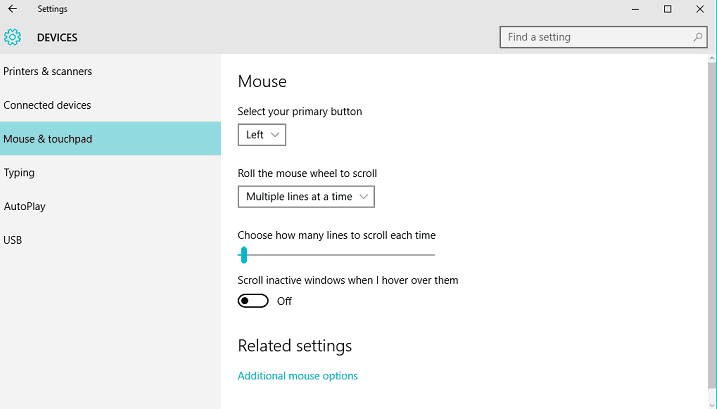
- Press Windows + I to open Settings.
- Go to Devices > Touchpad.
- Find the Scroll Inactive Windows option and disable/enable it.
- Try disabling and enabling this option a few times.
Method 2: Check the Local Area Network Settings
- Type control in the search box and select Command Prompt.
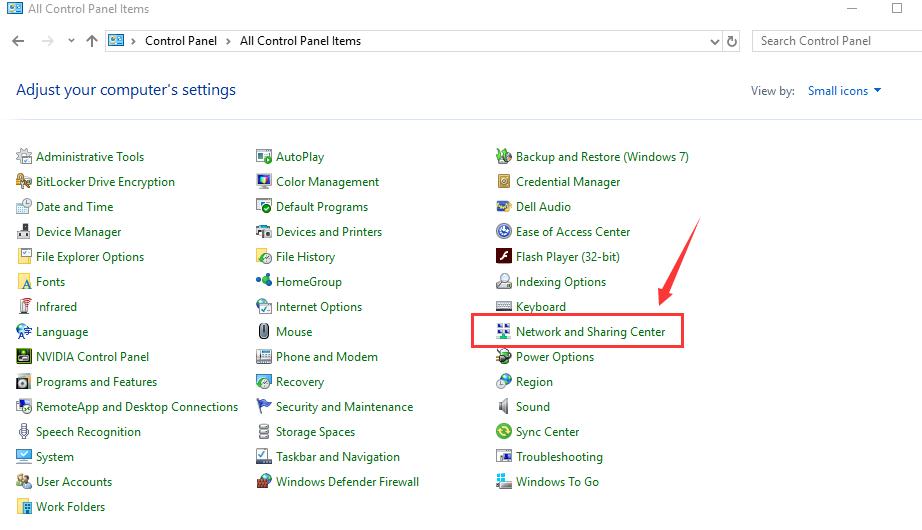
- Press Tab Select View by: small icons.
- Press Tab until you highlight Network and Sharing centre.
- Press Enter.
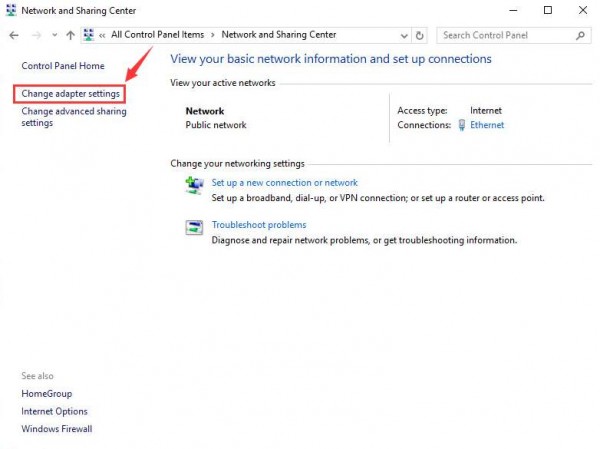
- Press Tab to highlight Change adapter settings and press Enter.
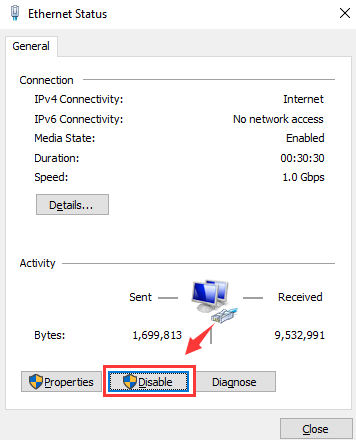
- Go to your LAN card using Tab key and press Enter.
- Press Tab to highlight Disable, once on Disable press enter.
- On your Network connection window press Enter to enable your Network connection.
Method 3: Change Palm Check Threshold
- Go to Mouse & Touchpad settings as shown in method 1.
- Click Additional Mouse Options.
- Select TouchPad Tab.
- Click on Settings and go to Advanced Tab.
- Find Palm Check Threshold and move it to the left.
Method 4: Re-install Mouse Driver
- Press Windows + X and select Device Manager using arrow keys and press Enter.
- Press Tab key and then down arrow key to go to Mouse and other pointing device.
- Press Left arrow key to expand it.
- Press down arrow key to get to your mouse and hit Enter.
- Press Tab key and the Ctrl key at the same time to get to the Driver Press Tab to get to Uninstall Device. Then press Enter.
- Press Enter to restart your computer.
- Restart your computer and check if mouse stuttering problem is fixed.
Method 5: End Realtek Audio
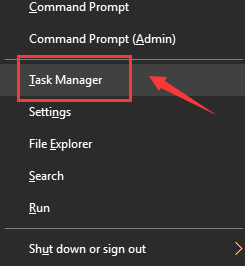
- Press Windows + X and select Task Manager using arrow keys and press Enter.
- Locate Realtek audio.exe. once again using arrow keys .Click End Task.
x
